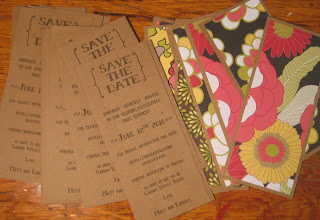
...Well they went out and they were a huge hit! 100% DIY (do it yourself) Here are the pictures of how we made them...
...first we printed about 50 save the date cards (std's) on kraft brown paper, and cut up a bunch of different fun papers that I already had and glued them onto the back of the kraft paper invites. Pictured here is on the left- backs of the std's and on the right is the fronts of the std's...

...We loved the idea of matt "entering" into my life/photostrip and together we are much happier than apart. its a fun idea we had only seen once and wanted to duplicate it. Of course we don't have a photobooth, nor could we afford to go to one. So Matt and I took a bunch of photos with a curtain background and a tripod in our house and crafted a photostrip on a photo editing program on my mac. We then cut and pasted that one photostrip over and over, and turned it into an 8x10 print to duplicate at the ever so wonderful and cheap...Costco. We printed about 8- 8x10s of "my" photostrip...then 8- 8x10s of "matt's" photostrip....

...so we cut up the photostrips, glued them onto the cute paper std fronts, and added some fun vintage photo corners...
...then voila! Done! Pictured on the left is the back of one std, and on the right is the front of another std card. We also addressed the green envelopes through the computer/printer in the same font that we thought really felt like our wedding (which was hard to choose out of 1,000 fonts let me tell you!) Chardin Doihle- from dafont.com if you are interested. I know its nicer to hand address envelopes, but I think it would have looked a bit more tacky had I done it myself. We chose the celebrate stamps, because not only are they cute but we are celebrating... we are truly getting married!! And we can't wait!!...


